Entities
Entities are the canonical representation of business domains such as Customer, Product, Vendor, or CostCenter.
What defines an entity
- YAML metadata (name, display name, domain, description).
- Column definitions, validation rules and visual representation.
- Governance flags (approval, history, retention).
- Optional consumption views for analytics and APIs.
- Anomaly detections
- Complex row level validation rules
YAML structure at a glance
Most of these settings and definitions are typically created by data engineers or analysts. For that reason, entities are not modeled through a large and complex GUI, but through simple and clearly defined YAML structures. These definitions can be exported to Git, deployed through standardized CI/CD pipelines, or even drafted with AI assistants and agents. An example YAML definition is shown below.
name: customer
displayName: Customer
domain: Finance
approvalRequired: true
historyEnabled: true
columns:
    - name: code
        dataType: string
        nullable: false
A YAML file defined in this way can be validated, deployed, and redeployed when changes are introduced.
Entity lifecycle
The end-to-end process of working with entities in EntiHub can be divided into these lifecycle steps:
- Author or edit YAML.
- Validate definition.
- Deploy to materialize data structures.
- Operate records in edit and approved flows.
- Redeploy on schema evolution.
- Consume in company data frameworks (DWH, CRM, marketing, ...)
Entity features
List Entities
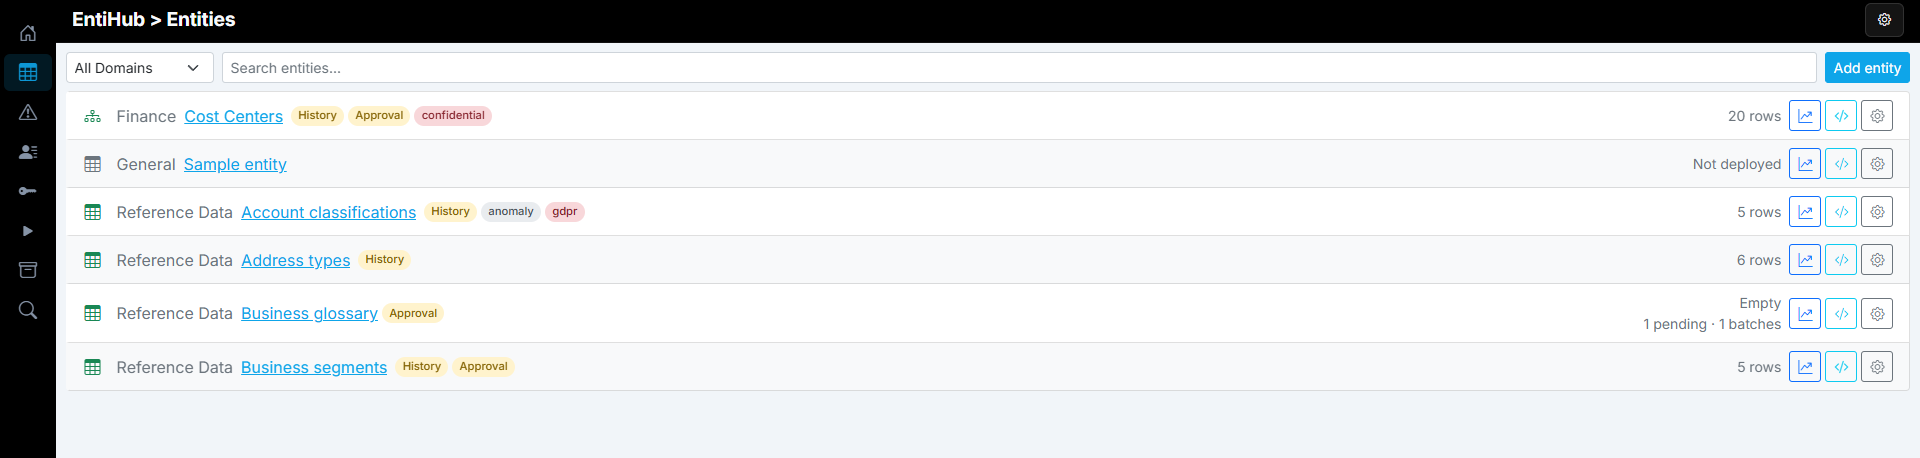
Users can see the list of entities by clicking the second button in the right-side panel. If the user is a Global Admin, they can see all entities and all available features, as shown below.
The view displays domains and their entities. Entity type (simple table, reference entity, hierarchical entity) is indicated by the entity icon. Tags next to the entity name provide additional context, such as whether change historization is enabled, whether an approval workflow is active, whether the entity contains classified data (for example confidential or PII data), or whether unresolved anomalies were recently detected.
At the end of each row, you can see the number of records in the entity and whether some are currently in the approval flow. Based on user permissions, additional buttons are available for entity analytics, entity-specific APIs, and entity setup/administration.
Entities can be filtered in this view, and new entities can be added. If the user is not a Global Admin, they only see entities for which they have assigned permissions (admin, read, read restricted, write, or approve).
Display Data
When you click a selected entity, its data detail view opens. By default, this view does not show all data; it shows only Top N records according to sorting defined in the entity configuration. You can change the number of displayed rows and filter displayed data.
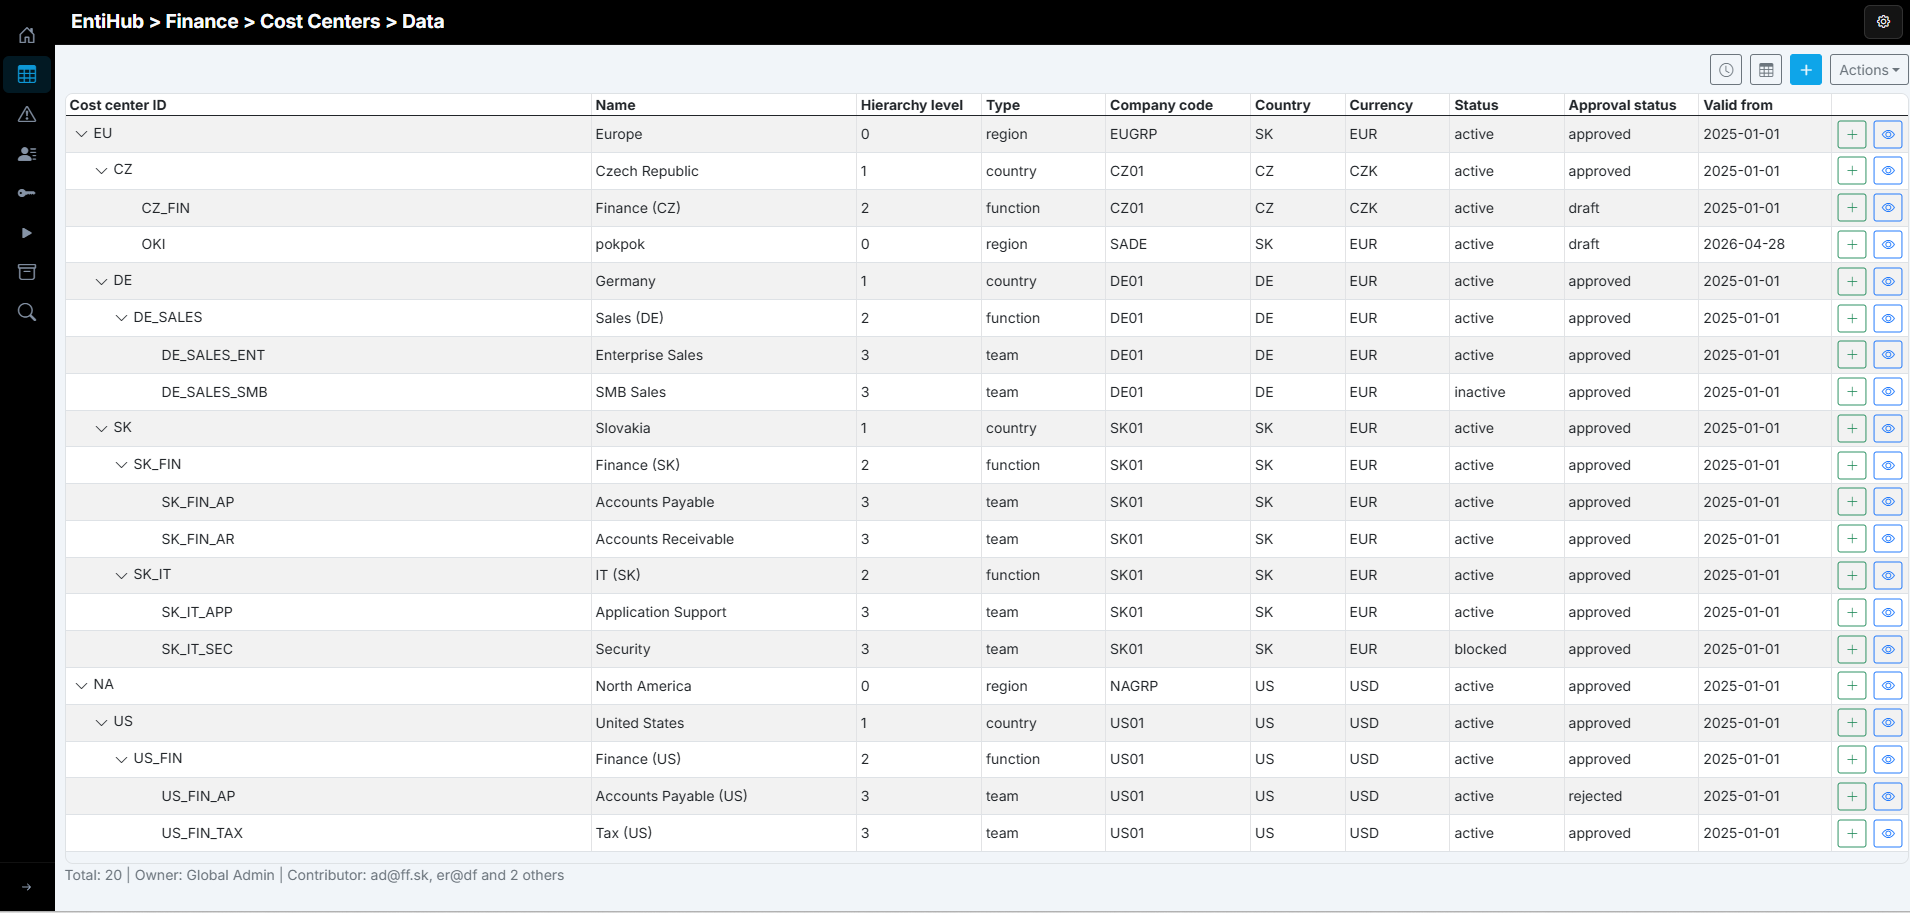
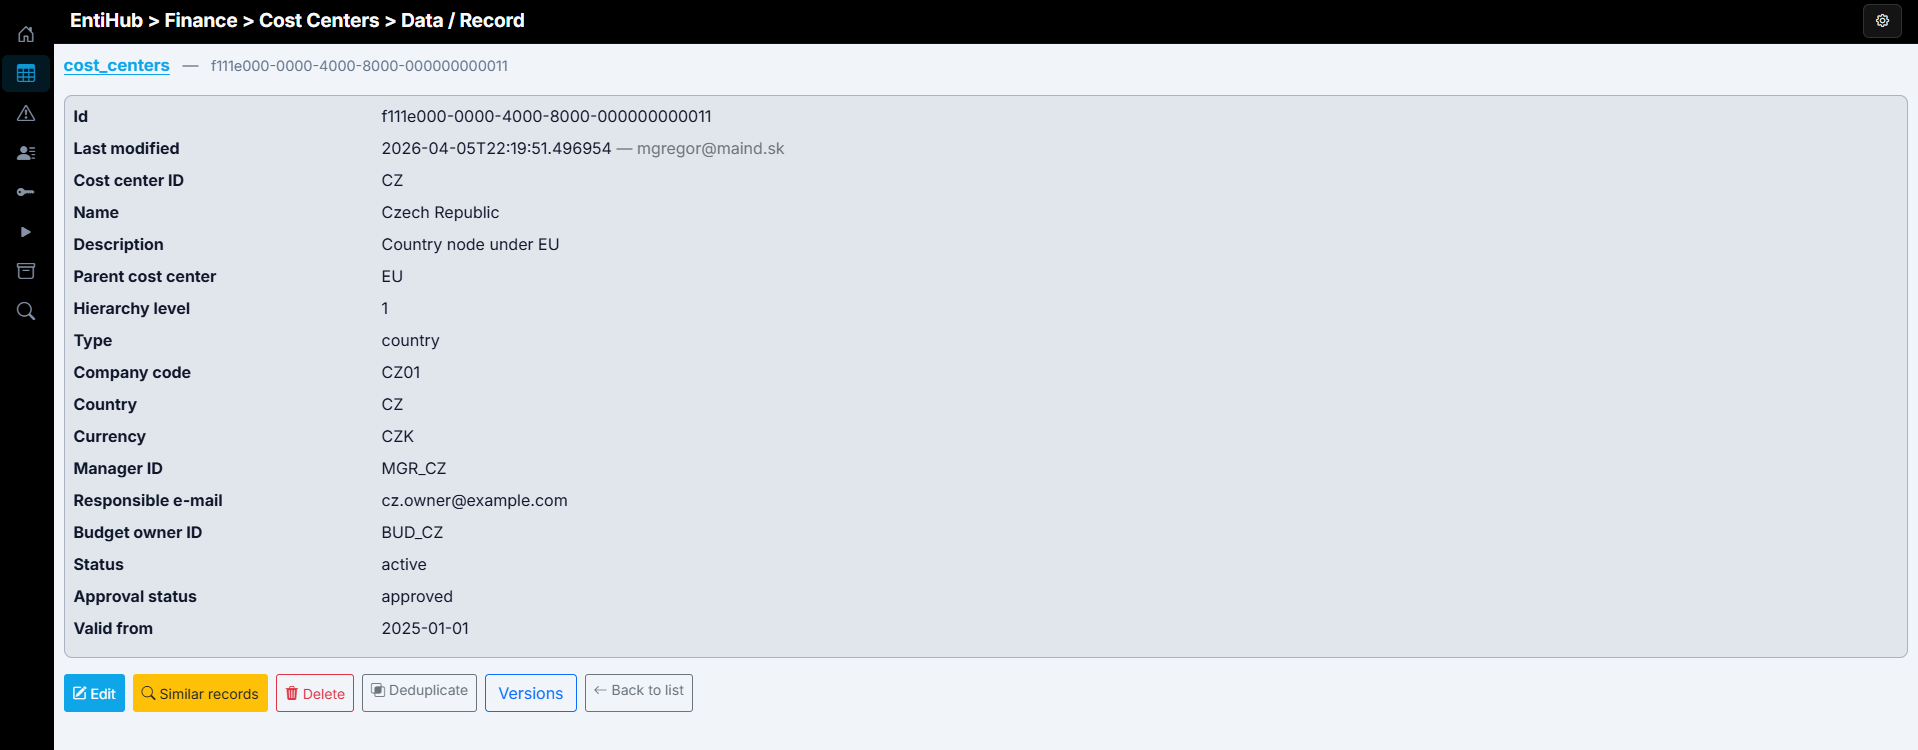
This interface lets you open details of each record (not all record attributes must be visible in the table view). In record detail, you can perform additional operations: edit a record, find duplicates or similar records based on logic defined in entity setup, soft-delete a record, safely deduplicate duplicates, and if historization is enabled, view the full change history of the record.
Edit Data
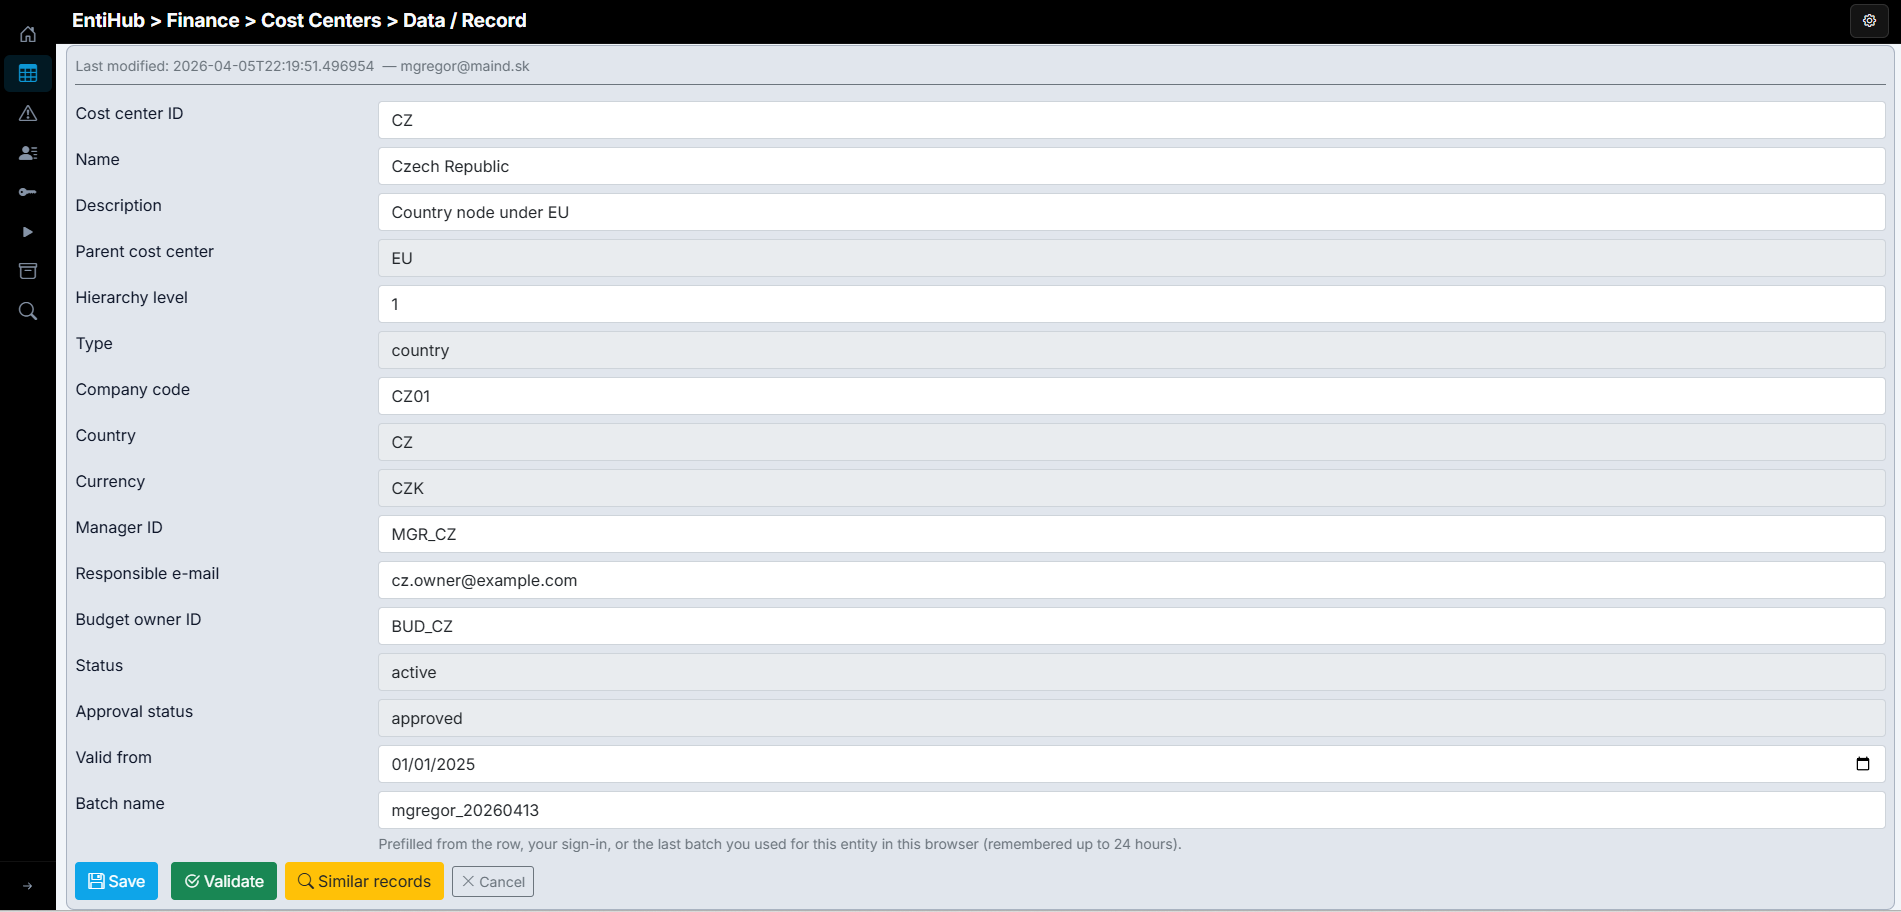
If you edit a record from detail view or add a new record, the entity record editor opens. This editor is fully configurable at multiple levels, all still defined in YAML.
In YAML, you can define column names, formats, helper descriptions, display order, validations, display masks, allowed values, reference-entity selections, conditional field visibility, and other parameters. Row-level validations can also be defined and shown directly in the interface.
After entering values, users can check for duplicates before saving. If users frequently add records with similar values, they can save the current setup as an Alias and reuse it in one click. This feature is enabled with a simple YAML switch.
This interface is designed so users see only what they need in context, reducing avoidable mistakes when working with manually maintained data.
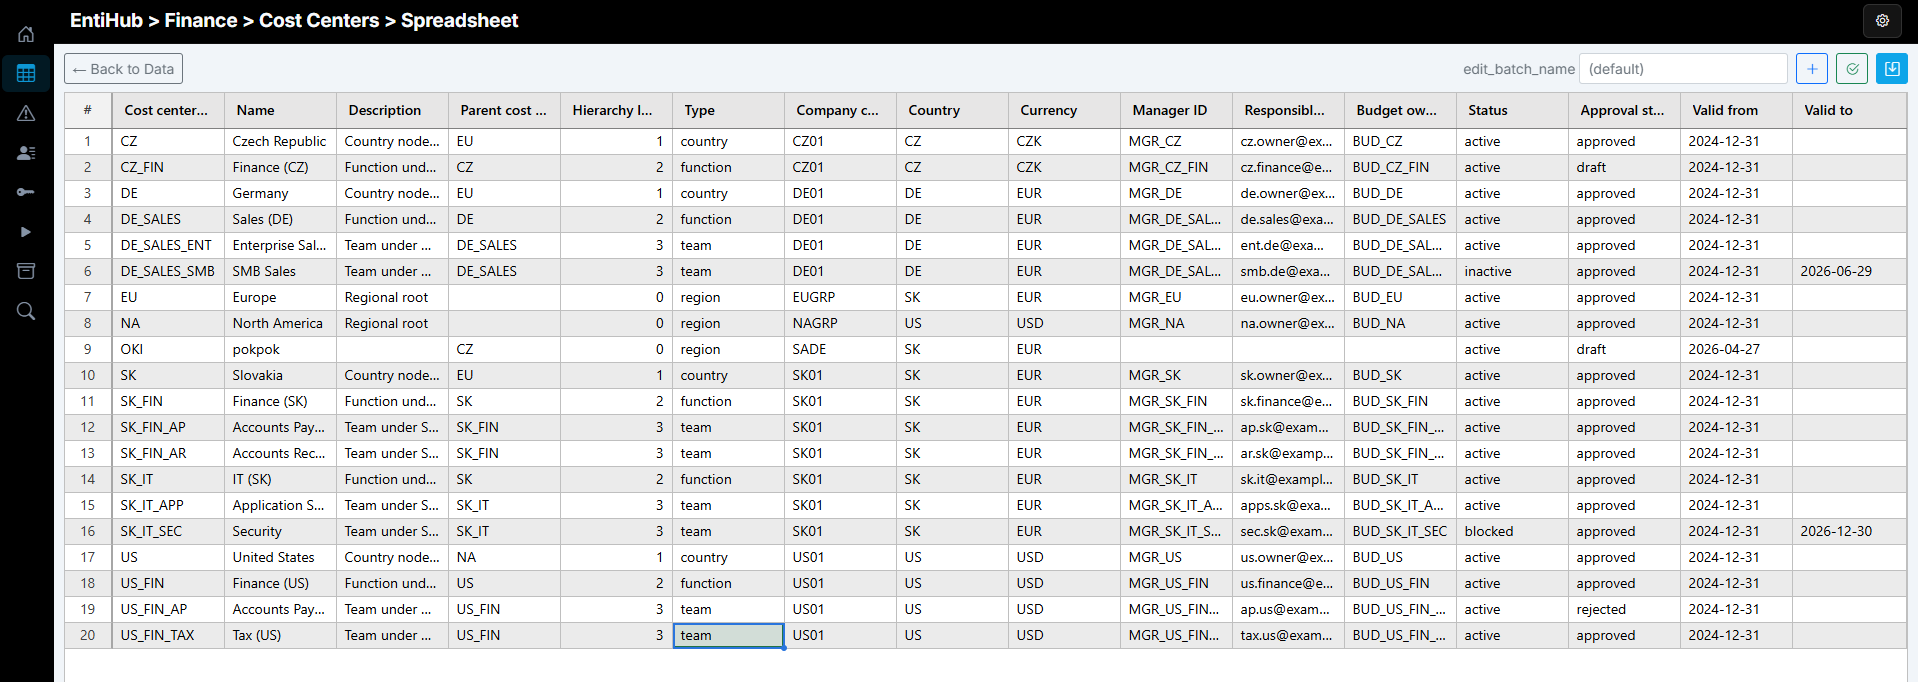
Advanced users often need to define or edit multiple records at once in spreadsheet mode. What users see in the table view (including active filters) can be opened in one click as a spreadsheet. In this mode, users can edit or add multiple records in parallel and use Excel-like copy/paste behavior. Before saving, all changes can be validated. If any validation fails, the invalid cell is highlighted in red and an error message is shown in the cell tooltip.
Data Historization
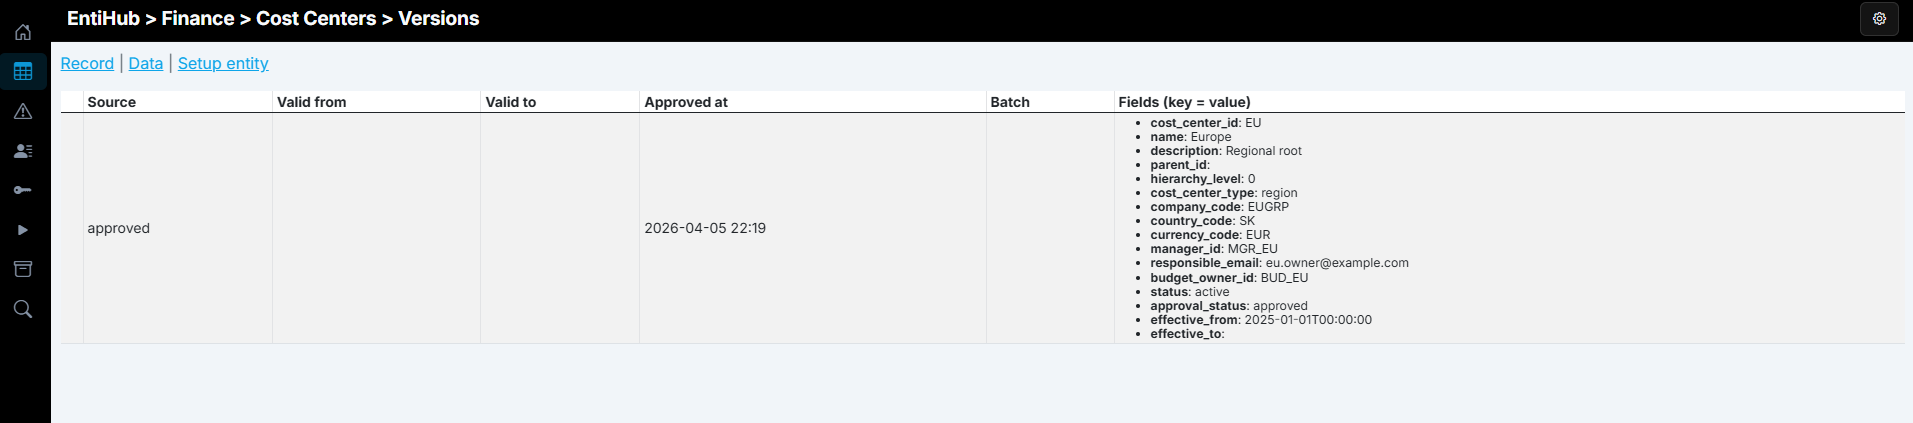
If historization is enabled on an entity (a single switch in entity setup), you can work with history of each record: view full change history, restore a selected record version, and identify records with unusually frequent changes during anomaly analysis.
At the full-entity level (in the Enterprise application tier), you can inspect entity state at a selected time using time travel, or restore the entity to a selected historical state to roll back larger sets of incorrect changes.
Entity Setup & Deploy
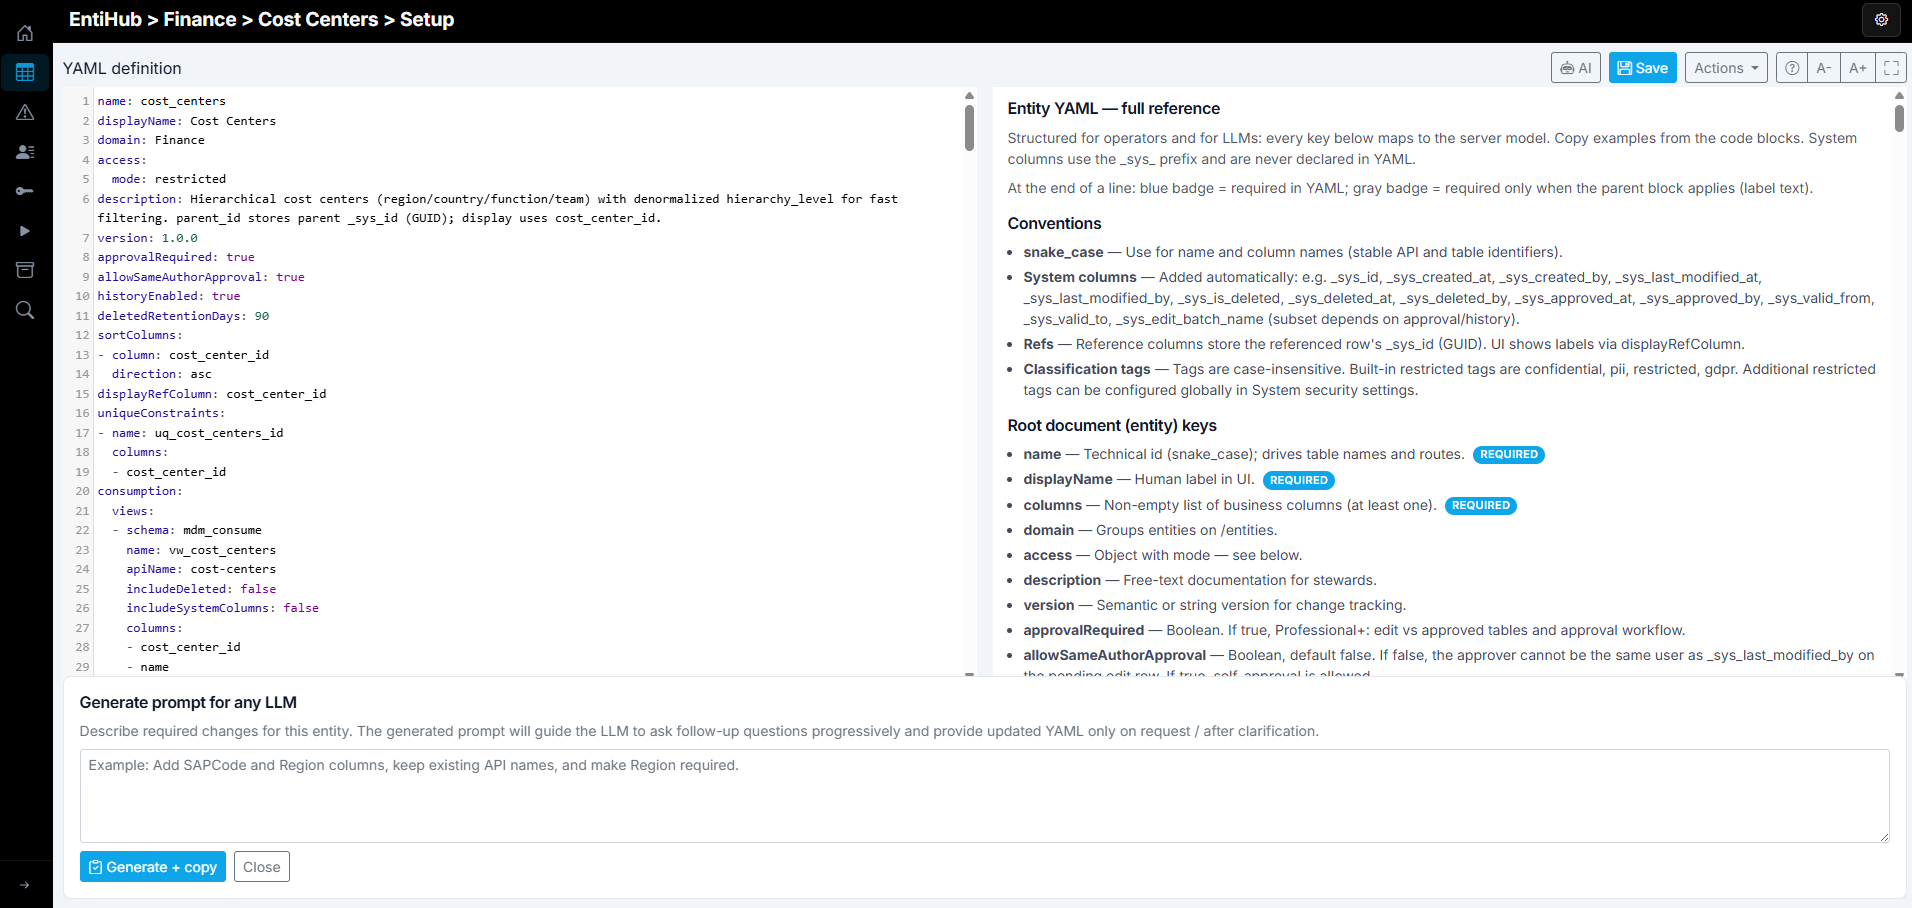
As already mentioned, entity setup is fast, simple, and straightforward. It can be easily integrated into CI/CD processes already used for other data projects. Everything for an entity is defined in a YAML file. The application includes built-in documentation for all YAML parameters and their settings.
Besides writing YAML directly, you can use the input box at the bottom to generate a prompt for your preferred LLM provider. The user simply describes the entity requirements. Based on your tier, the application prepares the necessary context and generates an LLM prompt. You can paste this prompt into chat, generate a fully functional YAML entity definition, then paste it back and save it. If required inputs are missing, the AI asks follow-up questions before generating the entity.
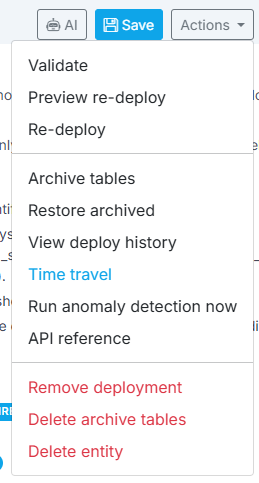
Once the YAML definition is prepared, you can continue using functions under the Actions button. You can validate the entity, run deploy/redeploy preview, and execute deploy/redeploy.
You can also archive the entity and its data into a physically separate table in the database, restore it from that archived table, view deployment history, and manually trigger immediate anomaly detection.
Finally, you can remove deployed structures from the database together with data, delete archive tables, and remove the entity definition.
If the entity is historized and you use the Enterprise tier, you can restore entity data to any historical point using Time Travel. After clicking this action menu item, a time-travel dialog appears. It shows daily change volumes over time, and lets you choose a date/time target state to restore.

This allows you to roll back multiple changes made to records.
Entity Actions
In the entity data view, the Actions button provides additional options. Entity setup has already been described.
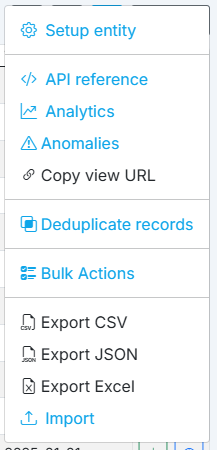
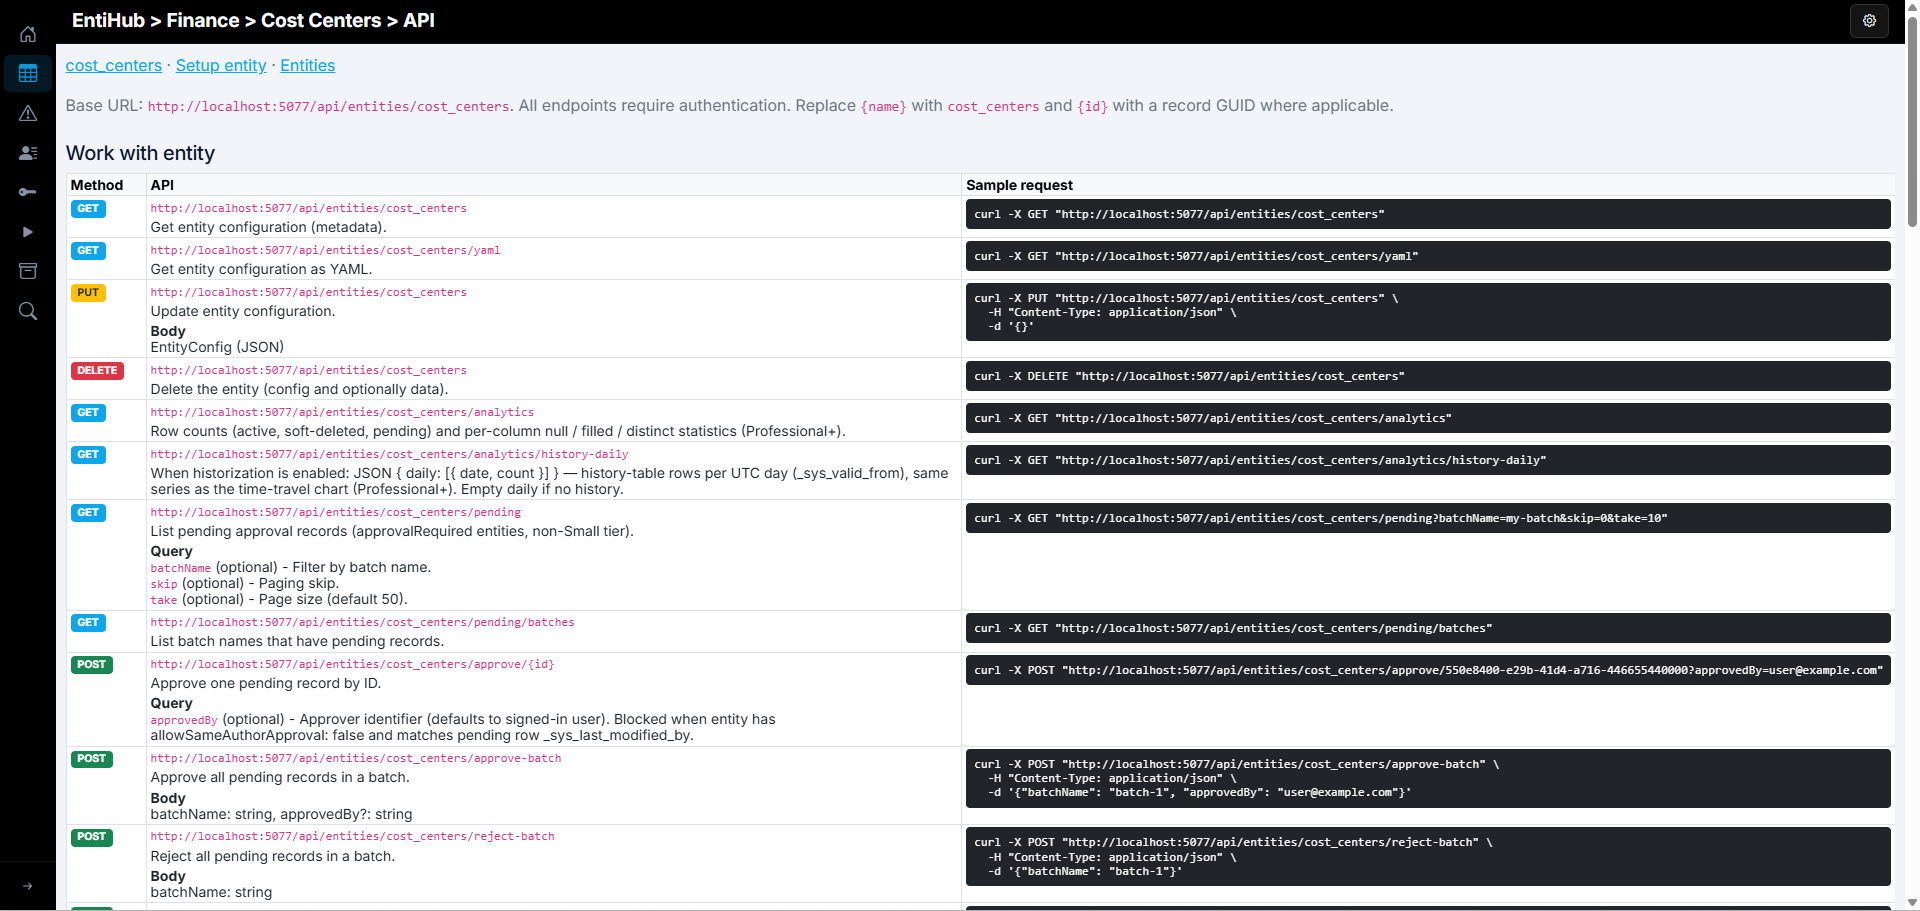
Among other features, you can display all API endpoints available for working with the selected entity. This includes endpoints for entity setup, data editing, approval process, and defined consumption views.
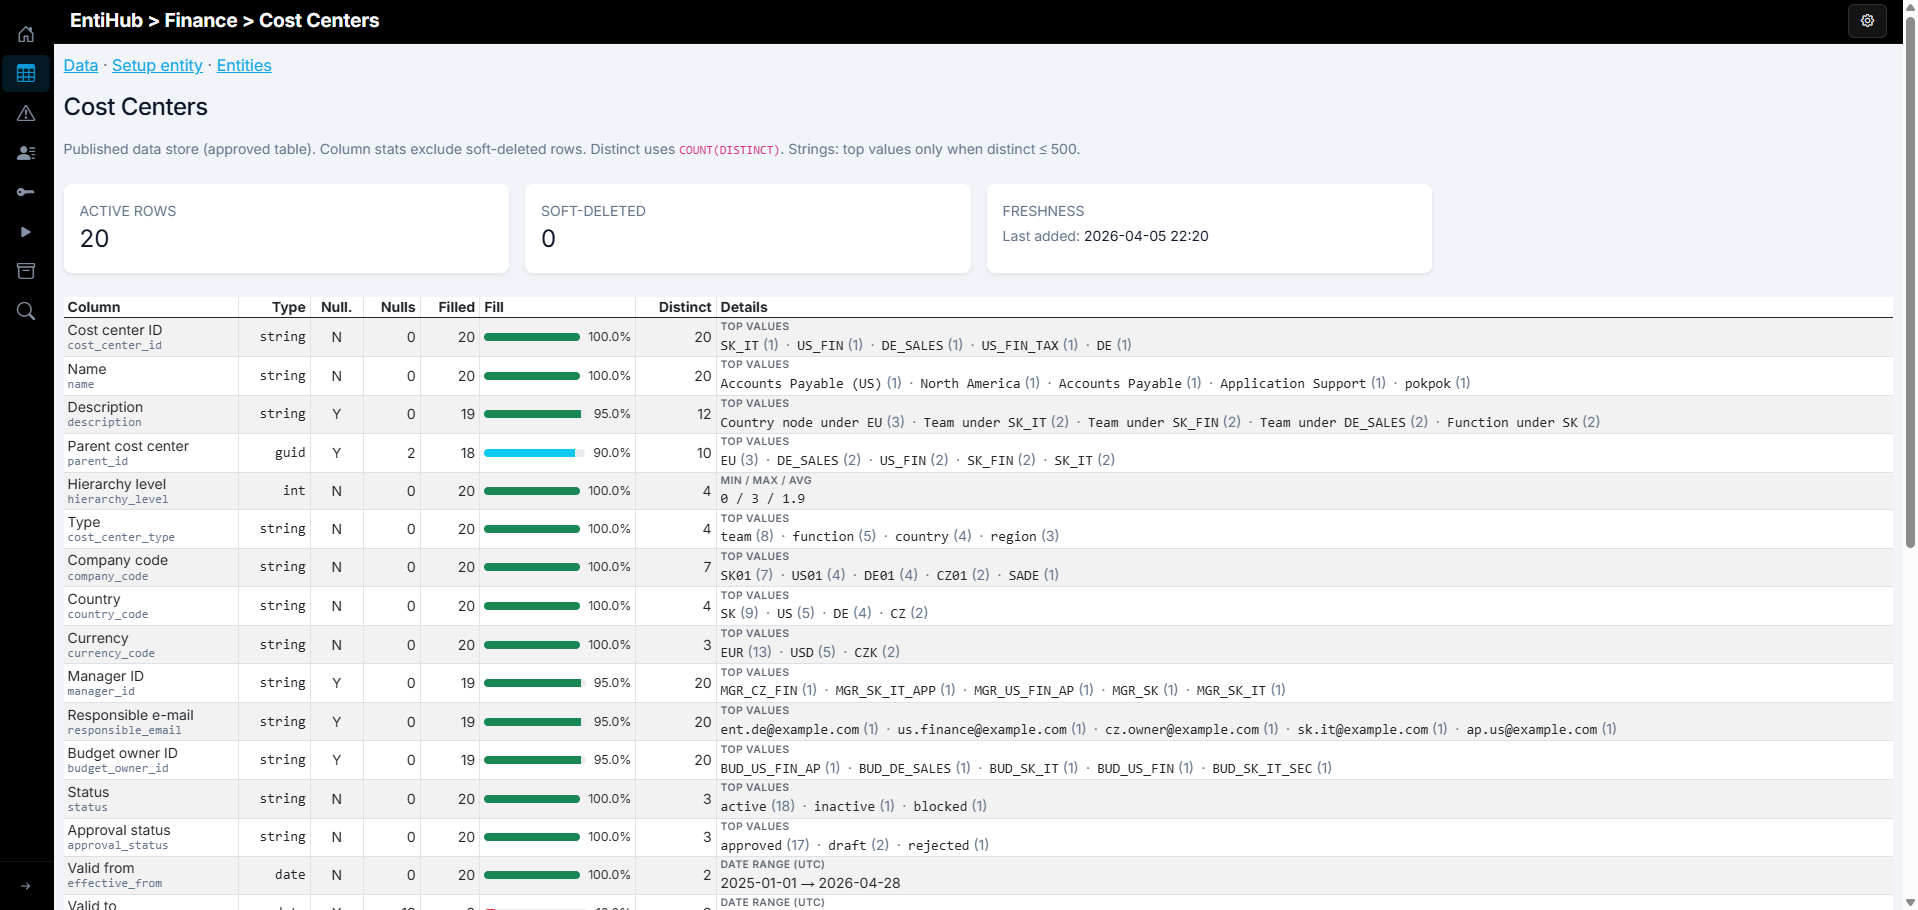
The Analytics function shows data analysis for an entity. In a single view, you can see active row counts, rows in edit/approval flow, entity data freshness, detailed analytical and statistical metrics per column, anomalies detected in the last N days, and trend of change counts over time.
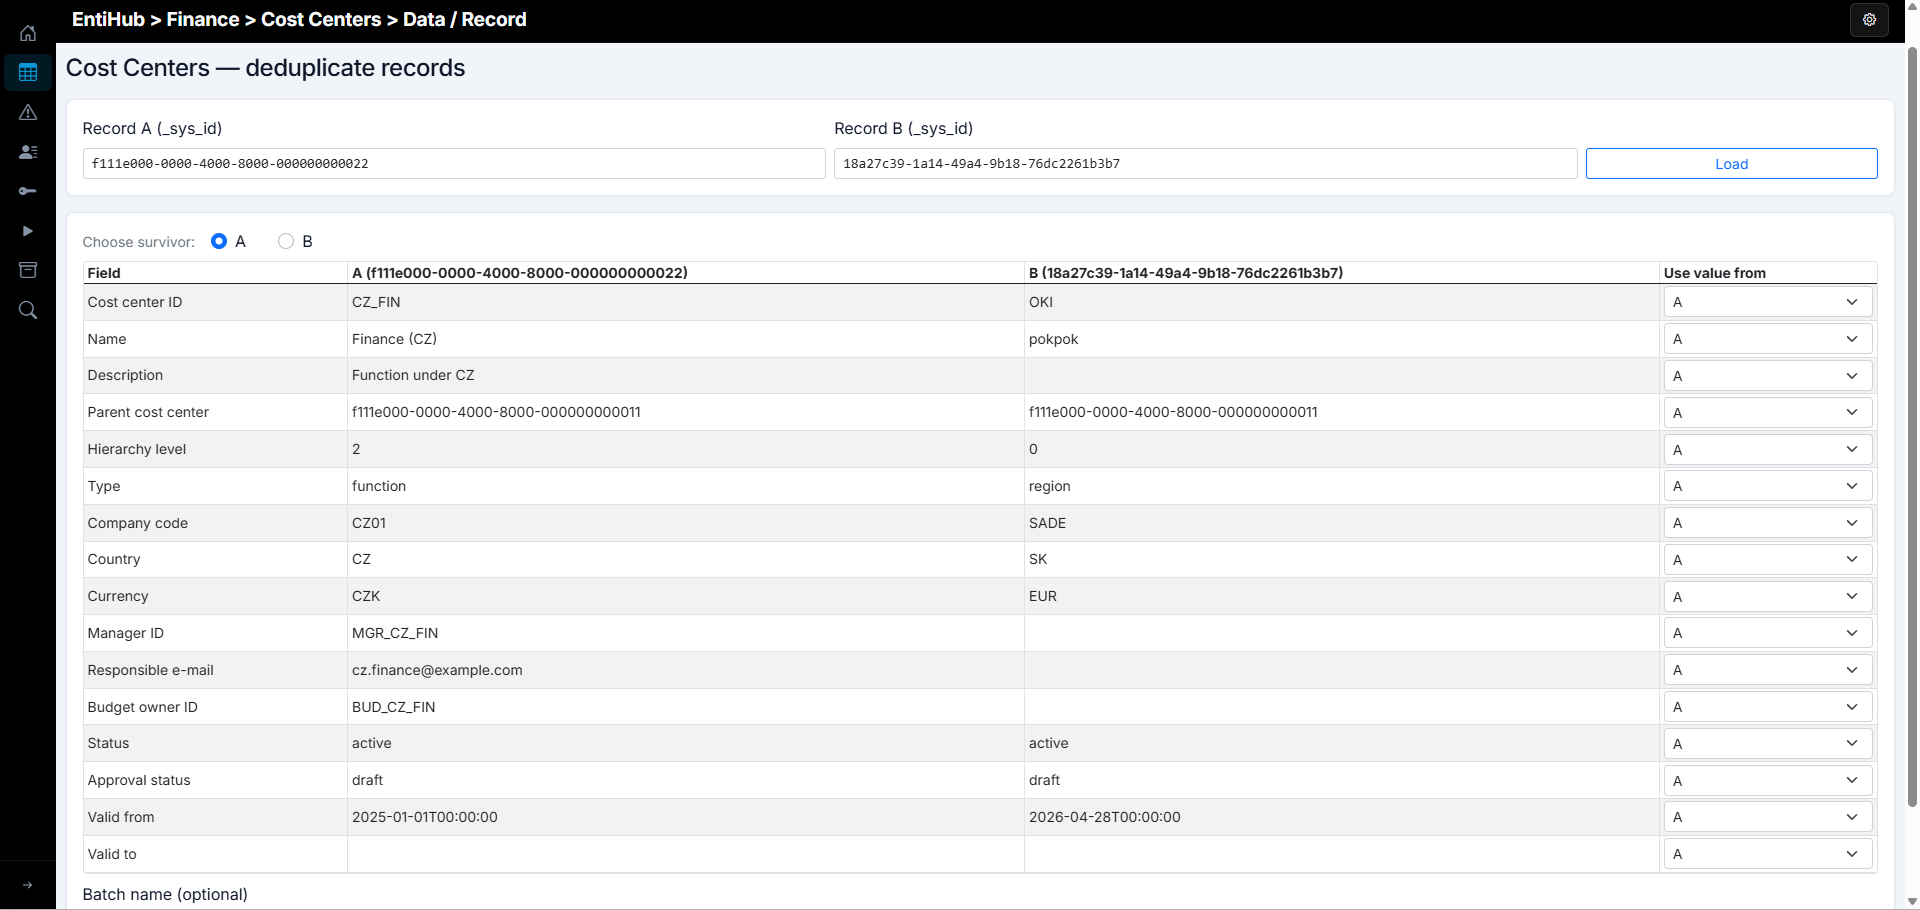
Another function is data deduplication. If duplicates appear in an entity, this function lets you resolve them safely by selecting which record (ID) survives and which values become current in the surviving record. If the record is referenced elsewhere, deduplication also updates those references, so no broken references remain.
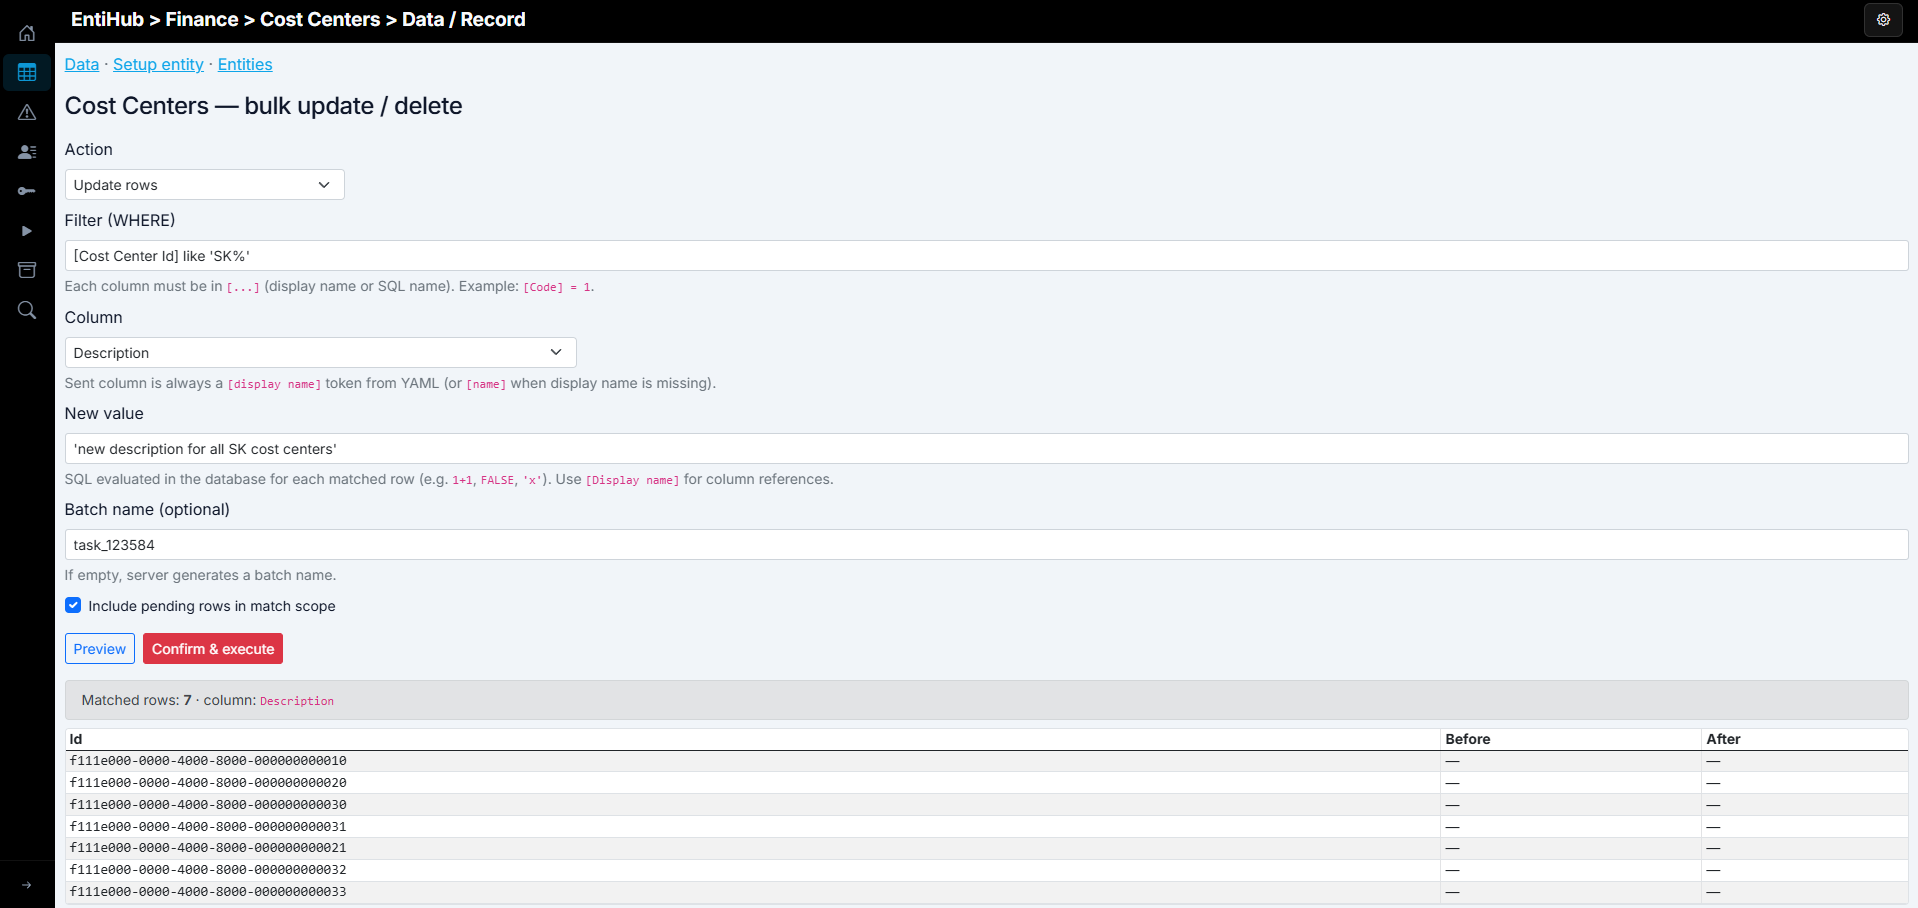
Another feature allows bulk update or soft delete over an entity. You define a filter for target records, choose the column to change, and define either a function (SQL) or a value to apply in bulk. You can then run a preview and execute the bulk operation.
Additional functions let you export entity data into multiple formats: JSON, CSV, or Excel.
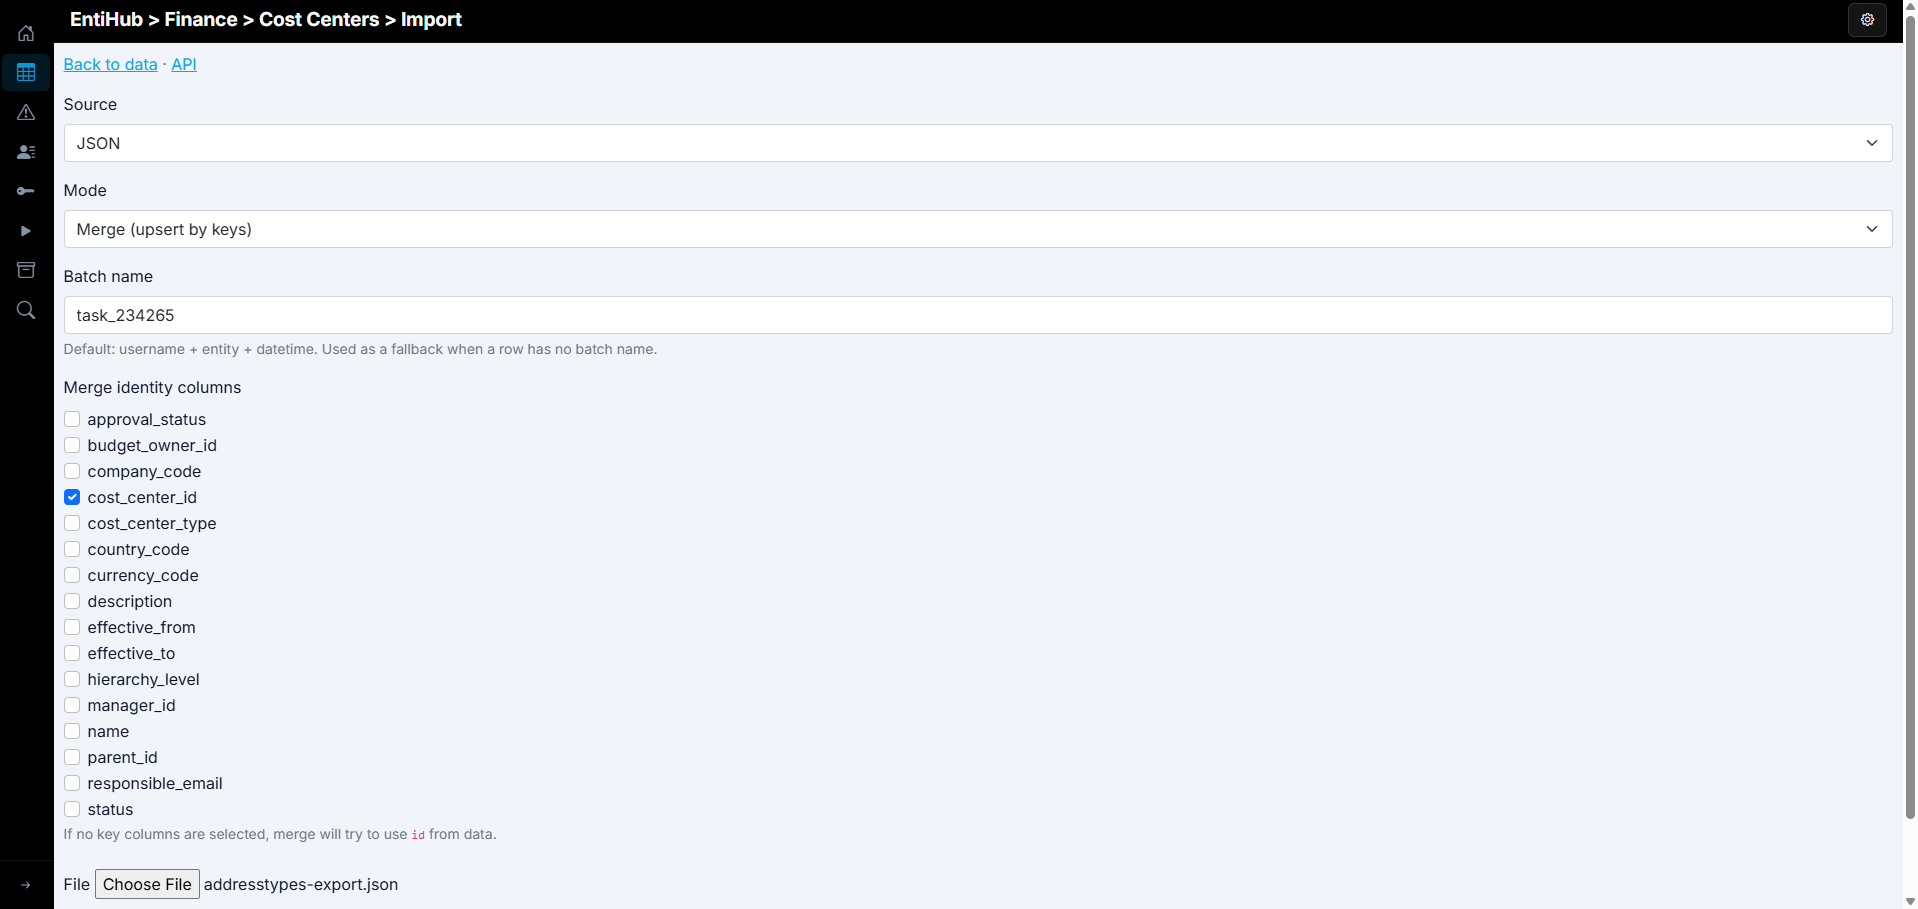
In the same way, records can be imported back into the application through a dedicated dialog. You select the input file format, choose import mode (append, merge, replace), and import data from the prepared file.
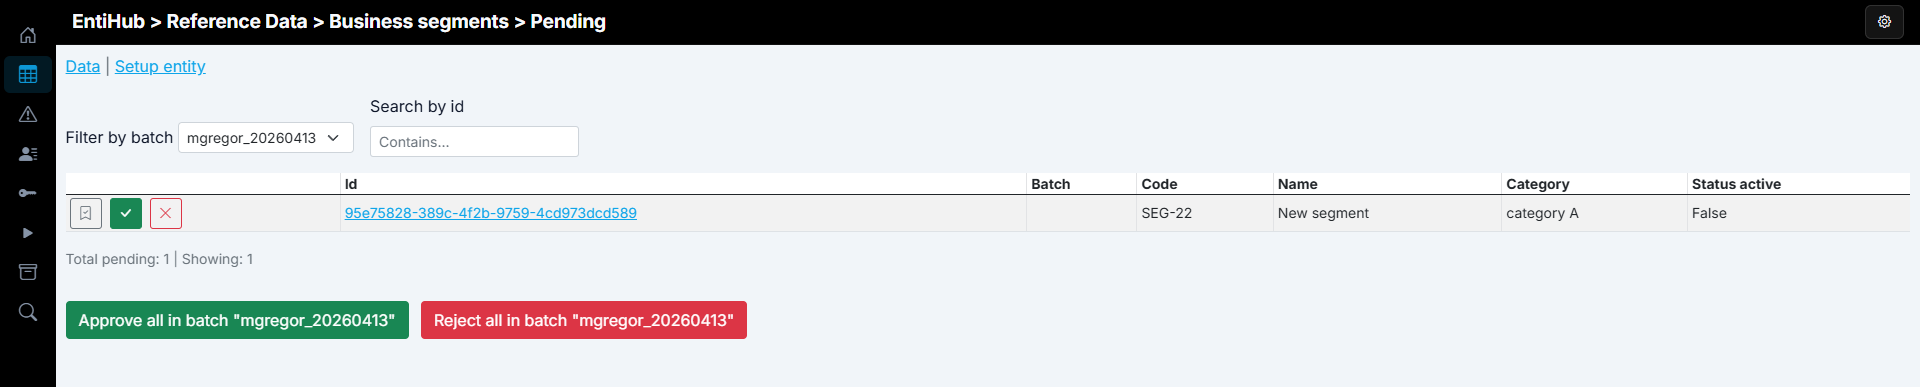
If approval is enabled for the entity, the interface supports the approval workflow: display edited records, compare them with current state, and approve or reject them one by one or in bulk.
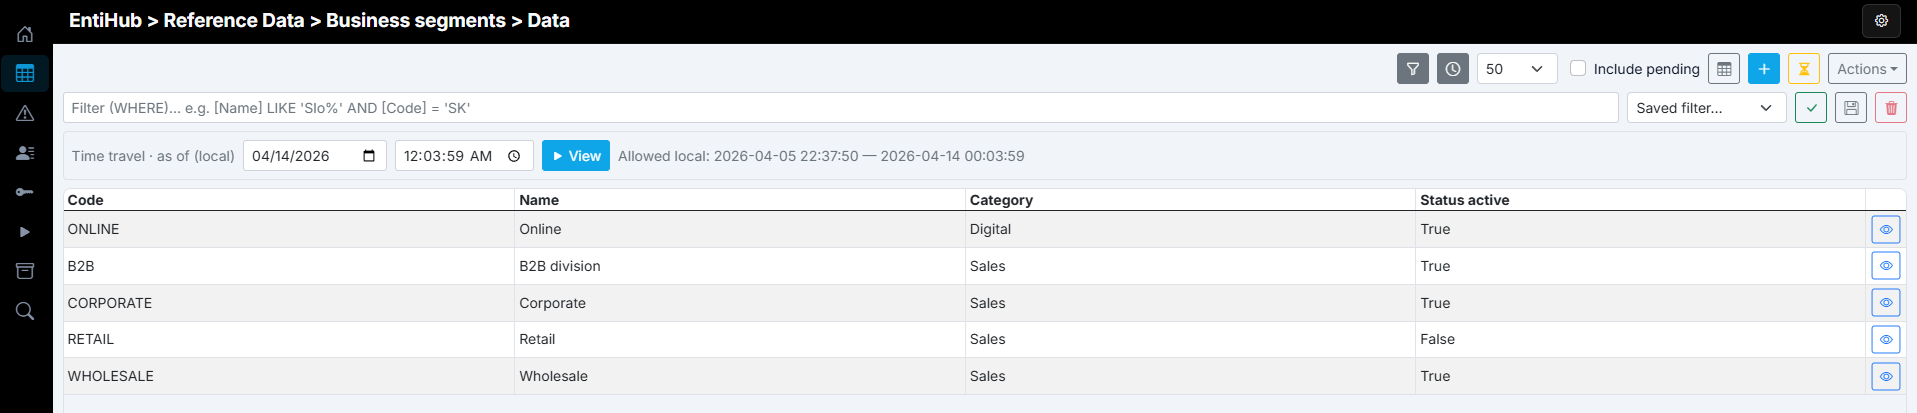
As noted earlier, the table view is configurable: you can set number of displayed rows (Top N), apply entity filters through built-in lightweight DSL, save filters for reuse, and in selected application tiers use time travel to display how data looked at a chosen point in history.
In the next sections of this documentation, individual entity functions are explained in detail. At this point, you should already have a clear overview of what can be done with entities and their data.